Aluminium Torus
March 20th, 2018
Aim: To create an Aluminium Torus using techniques shown to us in class
Objectives:
- Smooth even finish
- Minimal Burs and an even smooth edge
- Consistent Curve going both ways
- Even curve throughout the Torus
- Stand out from the rest
Process:
Firstly, using the shrinking machine I crimped the two sides of the rectangular piece of aluminium to provide a gentle curve throughout the whole piece.By doing this I also was able-to divide the Aluminium into 3 pieces to make it easier to mould.
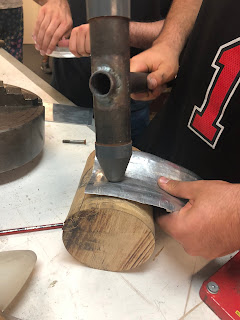
Then once the edges were crimped, using a log with a depression in it and a steel wth a plastic head mallet i began to carefully mould the aluminium to provide two directional curves into the piece.This process was challenging as you required someone to hold the piece of aluminium steady whilst i hit it, however it was easier said then done.As a result of it's complicating process I didn't achieve an even consistency on both sides meaning I had to keep on doing it again and again until it was right.
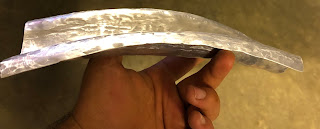
After I had achieved the desired look of the Torus I then utilised a planishing hammer and dolly to round the edges to provide a wavy cross section through the piece.This process provided greater depth to the aluminium and emphasised the look of the torus.I was also able to provide a hammer-tone finish to the whole piece making it look rustic.


No comments:
Post a Comment